Showing posts with label Split Drunkards Path Star. Show all posts

Monday, 11 June 2012

The Harry Potter Quilt, complete!


It just occurred to me that I never posted about the Harry Potter quilt once it was completed! I managed to get it done in time to present it to Bean on his birthday - yay! He was very pleased with it, and it has been on his bed ever since. He then promptly requested a Pirates of the Caribbean quilt for his next quilt, to which I replied that his next quilt is quite a way down my list!

Using painter's tape to baste the backing fabric to the floor  

And some more painter's tape to secure the batting

Quilt top in place, and ready to pin

Pinning, pinning and more pinning.
 I must have spent 2 hours pin basting this quilt.. I pinned every tumbler block, which was like 132 pins.. and then there were the Split Drunkard's Path Stars and the owls etc. My knees and my back were killing me by the end of it, I was walking like a little old lady! Even my fingers and palms took a beating. Next time it will be spray basting for a project this large!

On the upside, none of the pins were "in my way" when it came to the quilting, and it was quite therapeutic when I got to remove them finally!

Centre section basted and ready to go!

Gosh I love how the stars turned out - they're seriously my favourite part of the quilt!

Simple ditch quilting
 I decided that the quilt really wouldn't suit an all over quilting design due to all the different elements, and the good old "stitch in the ditch" was really the perfect option. I bought two different threads, a mid-dark grey for the back of the quilt and a mid grey-blue for the quilt top. They ended up blending so perfectly that you almost can't see the thread.. and the back of the quilt looks amazing because the quilting really makes the design stand out even though the backing fabric is charcoal grey.

I did some free motion quilting at the top and the bottom of the quilt where the blue fabric sections are - I attempted a spirally wave type of design that turned out better than I expected (but certainly not pro by any means!). I think it adds some movement in a subtle kind of way.

On the bed, ready to go!
I know I've said that if I'd had any idea how much time, effort and thought/planning/quilt math would be needed to complete this quilt I probably would have sucked it up and paid $90 for a Harry Potter quilt panel on eBay.... but really, it turned out so much better than I could have hoped for and I'm really rather pleased with myself. It's definitely the biggest, most ambitious and intricate project I have ever taken on (it really makes their "baby quilts" look tiny and insignificant) and it's nice to know that I can pull off something more than a lap sized quilt.

Now I just need to do some work on that king sized quilt I'm going to make for the husband and myself! (Don't hold your breath for that to be finished any time soon - I've only made one Swoon block so far!) And before I do that I have some BOM blocks to catch up on and a couple of swap projects to complete.. it's kind of nice to not have a major project with a deadline looming!

Incase anyone is interested to note, almost all the pieces of this quilt were cut using my Accuquilt GO! fabric cutter, using the 3.5" Drunkard's Path, the small Tumbler and the 2.5" Strip Dies. That includes all the sashing and the binding (LOOOOVE my 2.5" strip die!).

Thursday, 5 April 2012

Harry Potter quilt update

It's been ages since I've written an update on the Harry Potter quilt, and that's mostly because once I realised I wasn't going to have it ready before Christmas and it would become Bean's birthday present I just sat on it... because I had *time*... like a whole 6 months... except time has gotten away from me and now I have just less than a month. I can't disappoint my son by not having it ready in time for his birthday - he's been asking when he's getting his Harry Potter quilt and it makes me feel so guilty!

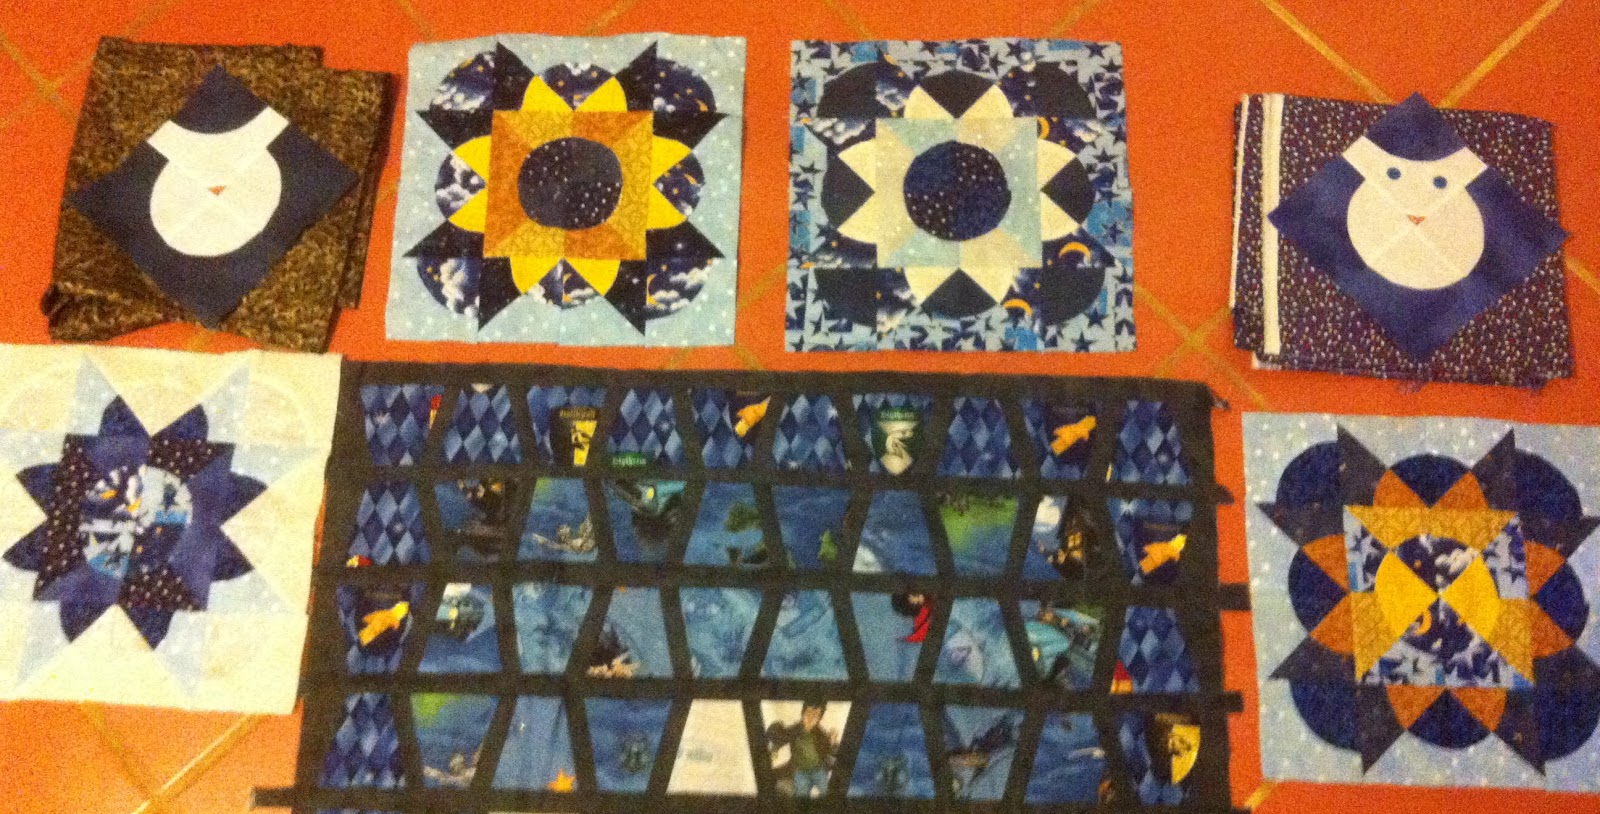
But over the last 2 weeks I've been on a roll - I completed the rest of the Split Drunkard's Path Star blocks, and laid it out so I could get an idea of how all my pieces looked together:
All my blocks, roughly placed.
 Next step: Making the owl blocks the same size as the star blocks. This shouldn't be too hard, right? It's just a case of cutting some triangles and sewing them on...
Auditioning 2 different fabrics as potential backgrounds for my owl blocks.
 I went with some blue "feedsack" (repro, of course!) fabric I'd bought at Spotlight, drew a scale drawing of my block and the "finished size" block and then used my ruler to work out how big my HSTs needed to be in order to make my block the right size. Luckily for me, it went together pretty smoothly. (Clearly my quilt math was ok!)
My larger owl block (unpressed)

Blocks laid out again with the larger owls
The next day I worked out how I was going to sash the stars to make them fit and have now turned them into strips of stars (but I forgot to take a photo) and I went and purchased a complimentary fabric that will go at the top and the bottom of the quilt top to make it longer. I think the width will be fine once it's all sashed and put together properly.

I haven't had a chance to touch it since last Thursday/Friday though as my husband and I have spent most of our spare time playing with Daisy, my new embroidery machine. (He is playing with another design he's digitized as we speak! I am sure he's getting WAY more out of this toy than I am! Oh, and my sister-in-law had her baby, so we've been visiting my new nephew!) Hopefully I'll get a chance to go to Phillipa's in the morning for our regular Thursday sewing morning and work on it some more then. Only 25 more days until it needs to be finished!

Wednesday, 28 March 2012

Building blocks..

So after a very productive start of last week I got all caught up in the crazy non-sewing stuff that was pencilled onto my calendar... On Saturday I hosted a Baby Shower for my sister-in-law which was a lot of fun :) She loved her quilt, and all the other pregnant women oohhed and ahhed appreciatively! The "long-legged monkey" is still happily ensconced, but we're all thinking that it's just a matter of days until he or she makes her dramatic entrance... not long to go now! (She just txted me to say she didn't feel like going to baby yoga this afternoon, so I think it might be go time real soon now!)

8 completed Split Drunkard's Path star blocks
Over the last week I've managed to complete the final 8 Split Drunkard's Path Star blocks for Bean's Harry Potter quilt, so now I can lay out the pieces that will form the quilt top and hopefully work out how to put all the elements together with relatively little trouble. (Hah!) I still need to make the owl blocks bigger so that they are the same size as the stars, and then I need to work out how much sashing/bordering is required to make the star border fit around the sashed tumbler centre section. And then, I need to work out what I'll still need to do to get it closer to single bed sized. How I wish I had a copy of EQ7!!!!
I also completed my second March Craftsy BOM block, the "Broken Spiderweb". I love this block! I've seen it floating around the blogosphere, and I just think it looks amazing. Blossom asked me if she could have this block, so perhaps when I get Bean's quilt finished and can start on hers I'll have to incorporate the broken spiderweb block into her quilt design! (I have all her fabric - a combination of Sweet Divinity and Sugar & Spice by The Quilted Fish for Riley Blake.. just no specific design in mind yet) Can you tell I love the Quilted Fish? (My Craftsy BOM is using an FQ bundle of Delighted!)

Anyway, enough blogging, time for more sewing!

Linking up with:


Fresh Poppy Design WIP Wednesday at Freshly Pieced WIPs on Wednesdays

Wednesday, 21 March 2012

On a Roll!

Following on from yesterday's productivity, I finished Belinda & Linda's Good Fortune mug rugs this morning..
Belinda's


Linda's


Top side

Reverse side
I still have mine to make, and I was planning to make it exactly the same.. but I had an extra 9 patch block and I hate seeing things got to waste... so instead I used the extra pieces to square my blocks up.. I think I'll put a thin border of white homespun around it before I quilt and bind it.. it'll end up being a little bigger than the other mug rugs, so I guess it could always double as a candle mat!


 Next I pulled out the Drunkard's Path blocks that I'd split and pressed (enough for 3x star blocks), squared them up to 3.5" and laid them out. Unfortunately one of my blocks doesn't quite work for me (colour combination-wise) so I set it aside because I might be able to switch around some of my other blocks and retrieve the situation. But I finished one piecing one block (I couldn't be bothered going outside to the ironing board in the dark, which is why it's not pressed) and I've nearly finished the other (see note re: pressing)...
One block complete (needs final pressing)
  I *did* work out how to do that cool web string chaining thing though, so that my block actually stays looking like that even if I pick it up, and once I've pressed it all I'll need to do is just zip down those rows and it will be done!
Second block nearly complete 
 Linking up with:


Fresh Poppy Design

Friday, 10 February 2012

Quilty love...

Clearly today is a day of discovery for me! Aside from finding my Disappearing 9 Patch table runner on FaveQuilts.com (I must confess I knew they wanted to feature one of my tutorials, I just didn't know which one, or when), it was apparently also featured back in November on The Curious Quilter's "A Generous Helping of Quilty Holiday Gift Tutorials" blog post! How lovely is that?

And speaking of featured tutorials, Ebony from Love Bug Studios asked me if she could feature my Split Drunkard's Path Star block tutorial in her online magazine Blocks to Die For, which is all about ways to use your fabric die cutters (Accuquilt etc)


Wednesday, 4 January 2012

Tutorial: Split Drunkard's Path Star

A while ago I mentioned that I was going to write up a tutorial for the Split Drunkard's Path star block, but I must confess that Christmas and the end of the school year distracted me.. but now all that's over, it's a new year and the perfect time to get back on the wagon!

Split Drunkard's Path block
Step 1. Choose up to 8 coordinating fabrics - 2 for the "background" and 6 for the star. I cut my Drunkard's Path blocks using my Accuquilt GO! cutter and my 3.5" Drunkard's Path die. If you were using this block on its own for a quilt it would look amazing done with the 7" DP die. You will have left over DP pieces which you can use for other stars, or put aside for another project.

Step 2. Cut a total of 16 DP blocks, consisting of:

- 8 x "Background Fabric #1" (Outer curve pieces)
- 8 x "Background Fabric #2" (Inner curve piece)
- 4 x "Star Point Fabric #1" (Outer curve pieces)
- 4 x "Star Point Fabric #2" (Inner curve pieces)
- 2 x "Star Centre Fabric #1" (Outer curve pieces)
- 2 x "Star Centre Fabric #2" (Outer curve pieces)
- 2 x "Star Centre Fabric #3" (Inner curve pieces)
- 2 x "Star Centre Fabric #4" (Inner curve pieces)

Step 3: Pair the DP block pieces, alternating the "Star Centre Fabrics" (eg #1 + #3, #1 + #4, #2 + #3 and #2 + #4). Sew using your preferred piecing method. I pinned the blocks for the first 2 stars, and am now using a Curvemaster foot to piece the blocks for subsequent blocks.. seriously, much more consistent on the seams, with no pinning!

Step 4: Pair up 4 of the "Background" blocks with 4 of the "Star Point" blocks, and the 4 "Star Centre" blocks, matching the inner pieces. 

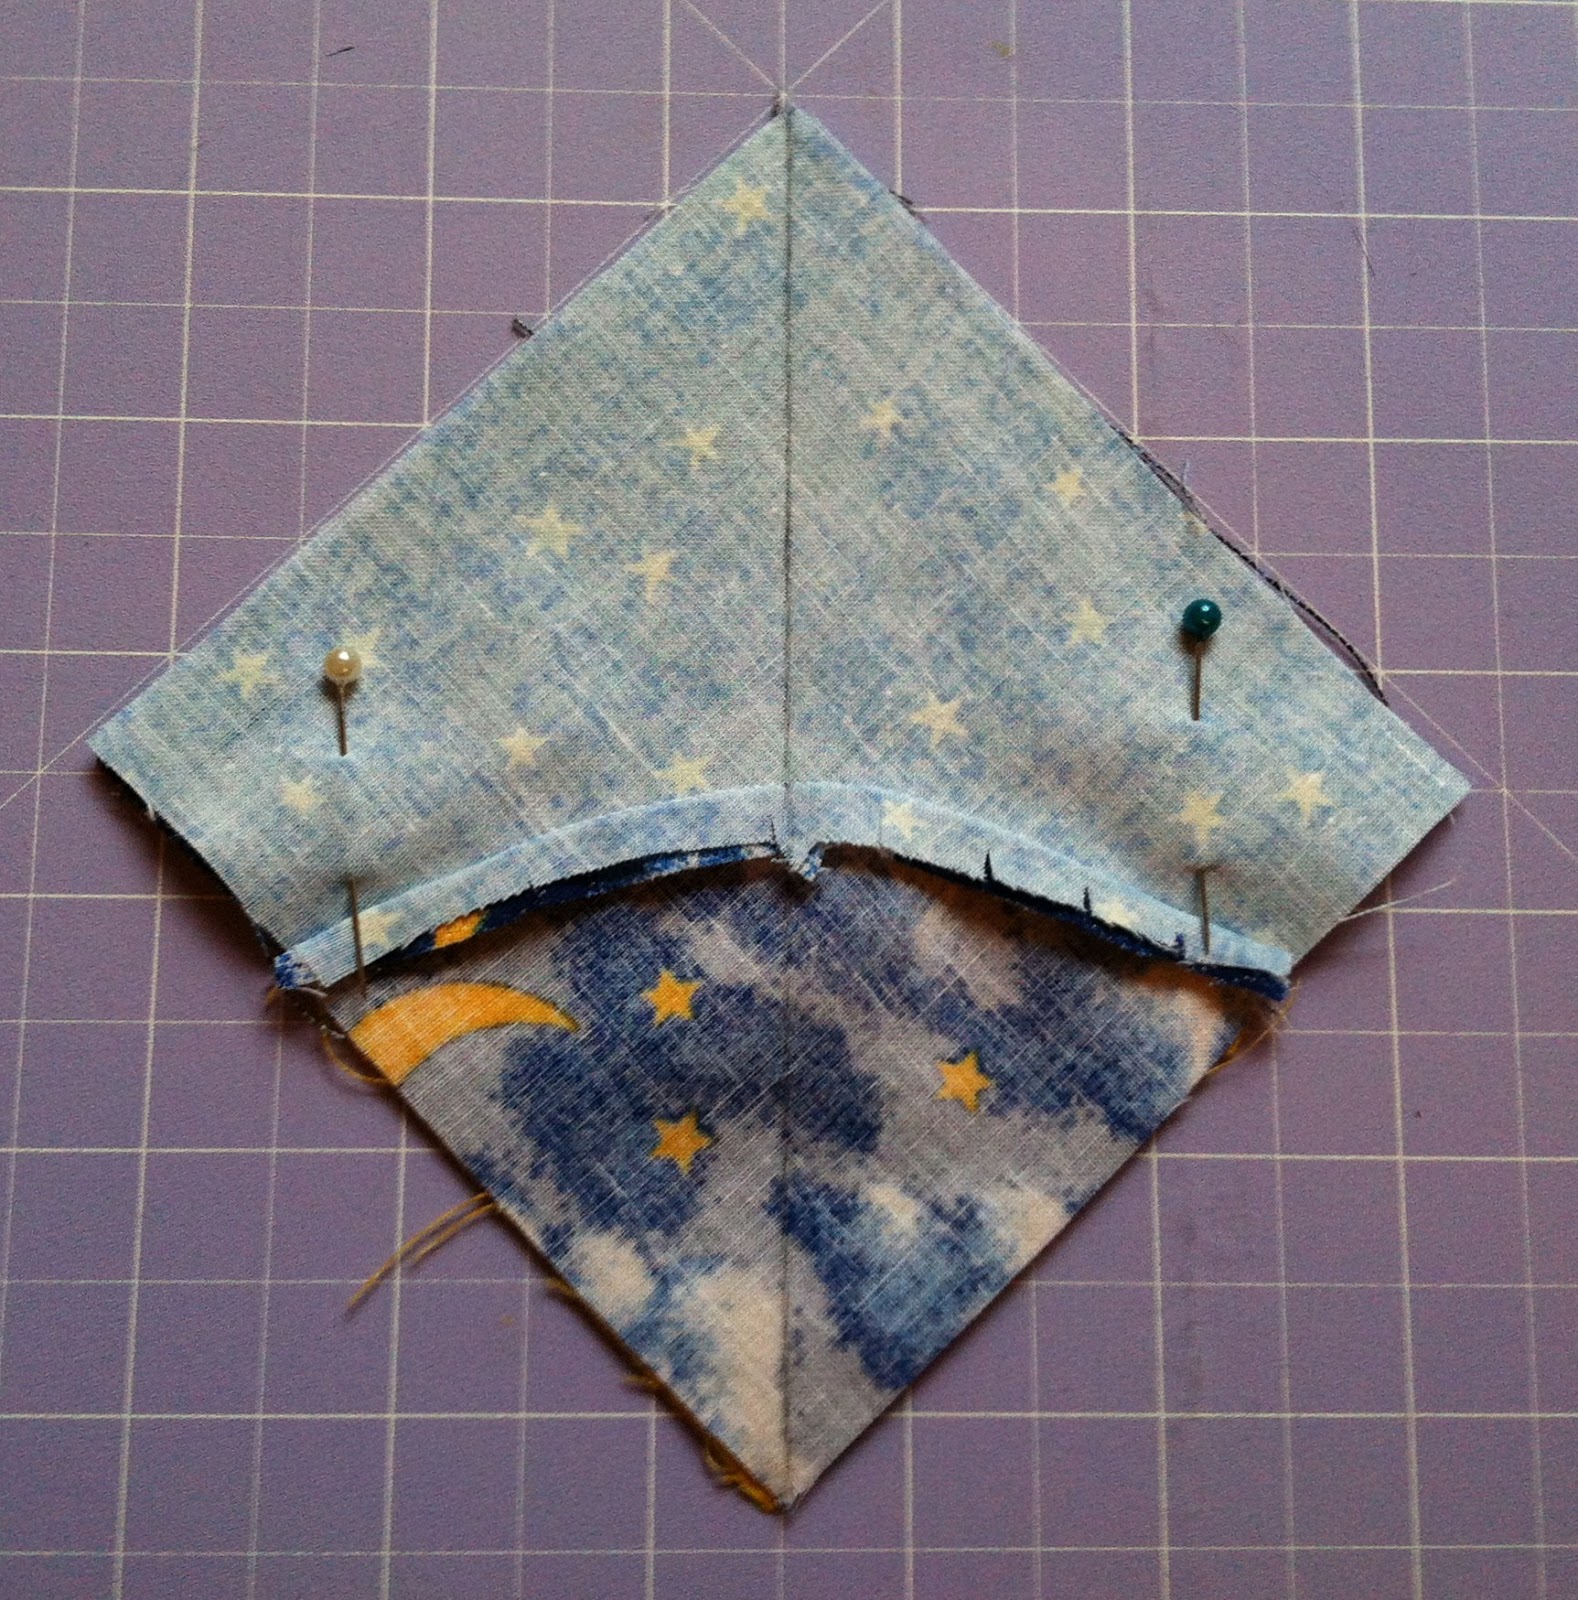
Step 5: Pin and mark a line diagonally through the centre of the block.

Step 6: Sew 1/4" on either side of the line. (as shown above with grey stitching + white stitching)

Step 7: Using rotary cutter cut along the pencilled line so that you have 2x blocks. Press open.

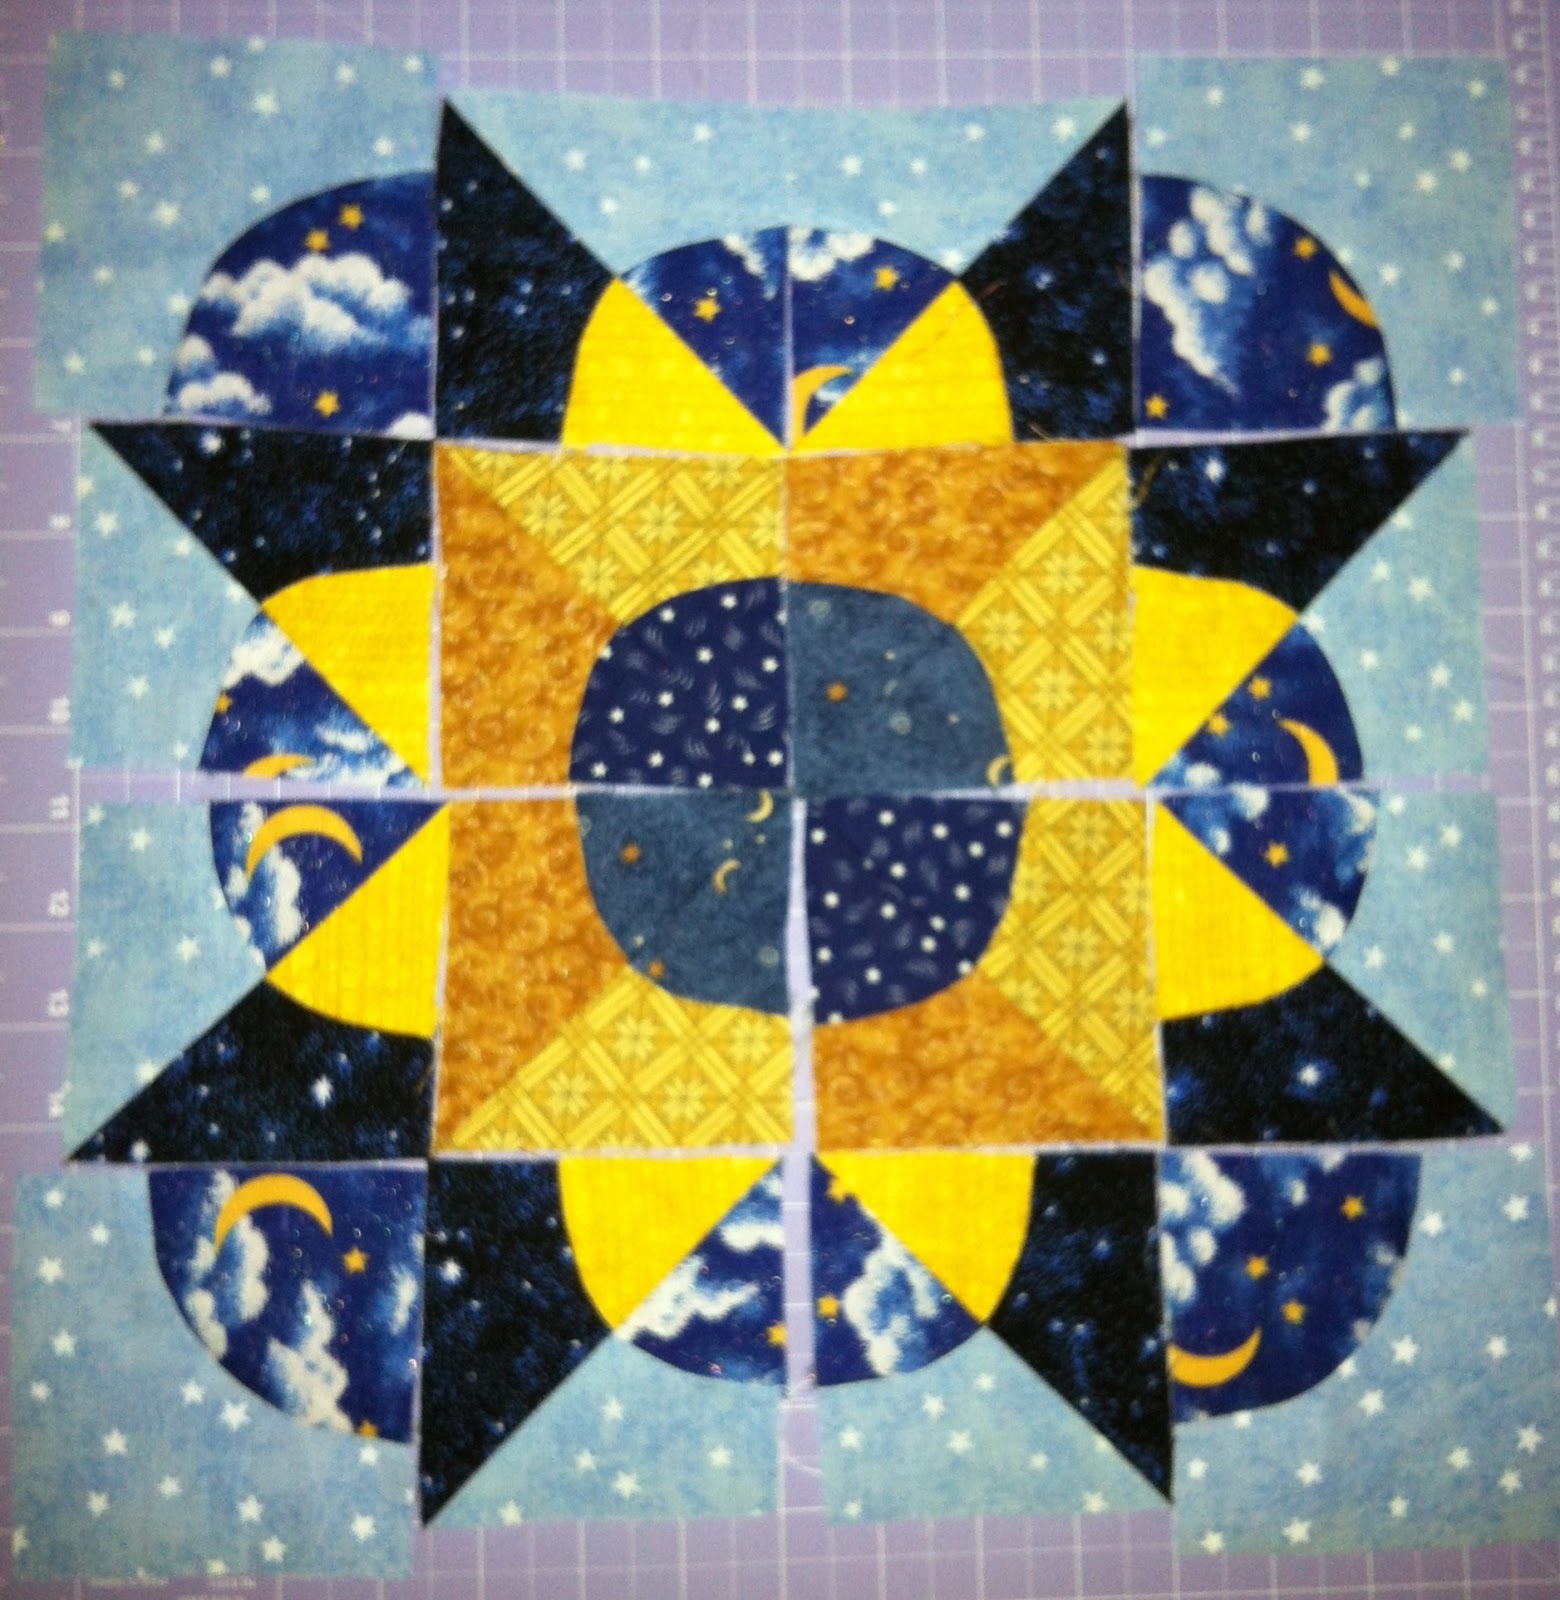
Step 8: Lay out your blocks to form a star shape. The 4x corner "Background" blocks will be larger than the other blocks as they haven't been cut up, but don't panic.. we'll trim them up!

Step 9: Sew the pairs of "Star Points" and the "Star Centres" together, making sure to match the curves. Attach one set of "Star Points" at the top and the bottom of the "Star Centres" to make a column. Press seams.

Step 10: Trim your 4 "Background" blocks to match your other blocks. I trimmed the outer curve pieces and left the inner curves at full size, but you could trim it evenly all the way around if you prefer.

Step 11: Sew the "Background" blocks to the remaining "Star Point" blocks so that you end up with 3 "columns" of blocks (as shown above). Press seams and then sew columns together making sure to match seams. Press again, and you're done! (Square up blocks as required)

My first Split Drunkard's Path Star complete!

And a second one so you can see it in a different colour
Effective, yes?
Related Posts Plugin for WordPress, Blogger...

ShareThis

Online Quilting Class