Showing posts with label apron. Show all posts

Tuesday, 20 March 2012

It's a day for finishes...

And better yet, it's only Monday! Although given what's coming up on my calendar, it might be 80% of what I get done this week.. but going back to the finishes, I finally finished my sister-in-law's baby quilt, ready for her baby shower this coming Saturday.


Would you believe it took me about as long to tie off all the loose thread ends as it did to quilt it? Thread ends are boring biscuits! Definitely going to add that "automatic lock stitch" feature to my list of requirements for when I get a new machine!


 But I'm happy with how it turned out overall - just need to wash it now so that it's all ready for my new niece/nephew to use when she/he arrives. (Or is it nicer to gift it to my SIL all pretty and shiny and new and perfect?) And I managed to complete it in a week.. with 5 days to spare until the baby shower.. my friend Catherine from Banana Monkey didn't think I'd be able to do it - oh ye of little faith!


 Today I also decided to quickly whip up another apron like the ones I made my kidlets for Christmas - this time it's for Phillipa's middle daughter who is turning 5 on Wednesday. Miss J is one of my favourite kids, and when I made the other aprons she helped model them so I could work out where the snaps had to go on the neck strap... and she really wanted one of her own, so I knew it would be the perfect birthday present. I'm pretty stoked that I managed to complete it from scratch in a day along with finishing the baby quilt!


 I'm linking up with Manic Monday over at SewHappyGeek as well as {Sew} Modern  Monday at Canoe Ridge Creations.


Sew Happy Geek

Saturday, 8 October 2011

Holiday shopping trips...

I've done lots of shopping this last week.. whenever we head up to visit my grandparents there is a standard list of places to visit:
* The second hand bookshop
* Rivers Clearance store
* Good Sammy's (thrift store)
* Spotlight (I know this sounds weird considering there are two Spotlight stores within a 30 minute drive of my house, but it's just what I do!)

This trip Mum and I added the local quilting store, farmers' market and the regional patchwork & quilting exhibition to our list as well. And I must say that we've had a very "successful" trip so far.. we head home tomorrow and we've actually managed to cross almost everything off our list! While I haven't specifically taken photos of the other things I've purchased, I found a top & 2 pair of pants at Katies, 2 pair of sandals & 2 shirts for my husband at Rivers, a Fred Bare pinafore and a pair of Clarks shoes for Blossom at Good Sammy's and we managed to trade 2 and a half bags of our own books in at the bookstore ($100 instore credit) for a bag of new books with no extra to pay! Woohoo!

But I *will* share with you my fabric/sewing related purchases with you:

Spotlight shopping trip #1 (Thursday)
 The local Spotlight was having a sale, with 30% off new release Christmas fabrics, buy 1 get 1 free patterns, $6 off Fat Quarter bundles and $6/metre clearance quilting fabrics (amongst other things!). It also turned out that today (Saturday) is their 5th birthday celebration, so they were running other specials/prizes/activities today and haf even more quilting fabrics still to be marked down so of course I had to schedule another trip for this morning. But more about that in a moment (or another post if this gets too long)..
Have I mentioned I have a thing for Holly fabric?

Pillowcase dress & pants pattern & fabric
 I found some cute strawberry print fabric on the quilting cotton clearance table as well as some blue checked fabric and another blue fabric that coordinated nicely (not the same range specifically) that I just couldn't walk past but couldn't justify without a project.. so I went and trawled through the pattern books for like an hour until I found 2 patterns that I thought I might like to add to my immediate project list. The first pattern was a pillowcase dress/top/pants collection that I thought would be lovely to make for Blossom. The top fabric (above) will be the main fabric for the top, with the strawberry print as the contrast panel at the bottom (see image D below) and the blue check fabric will be the pants, again with the strawberry print as contrast. I still have to go looking for ribbon though.

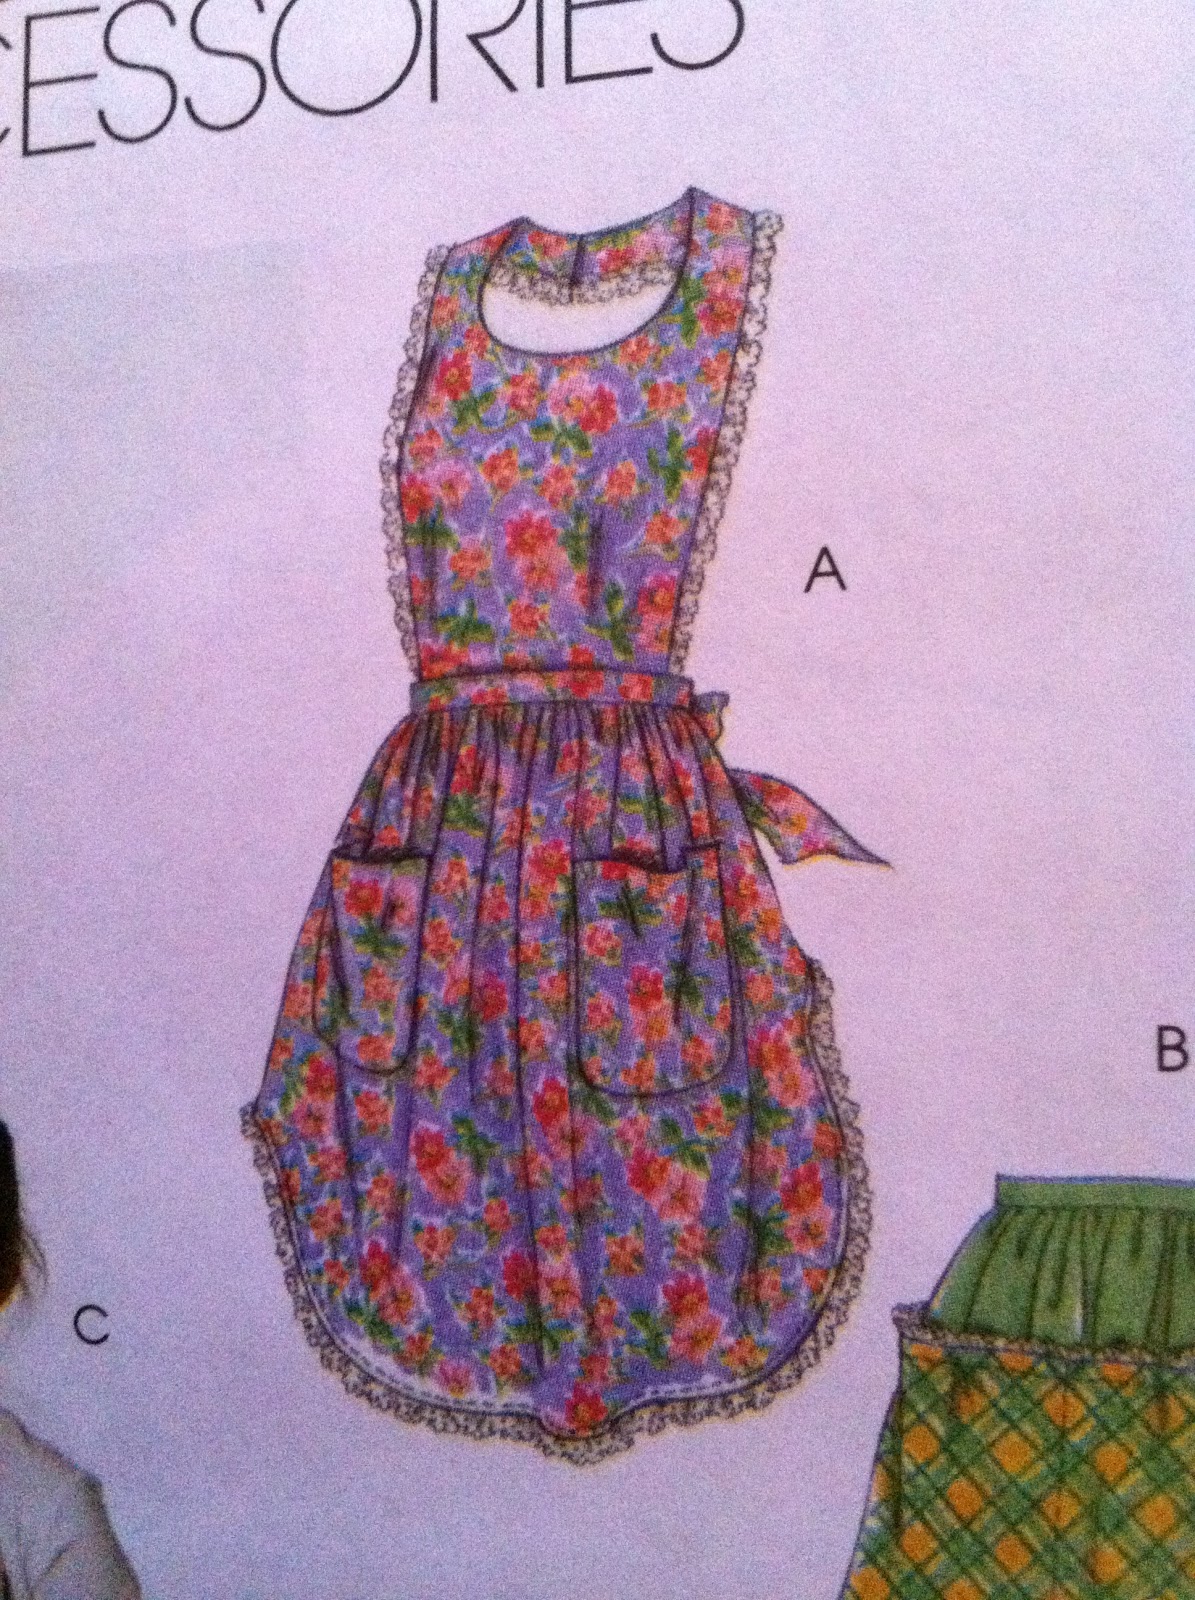
Another apron pattern - I plan to make design B 
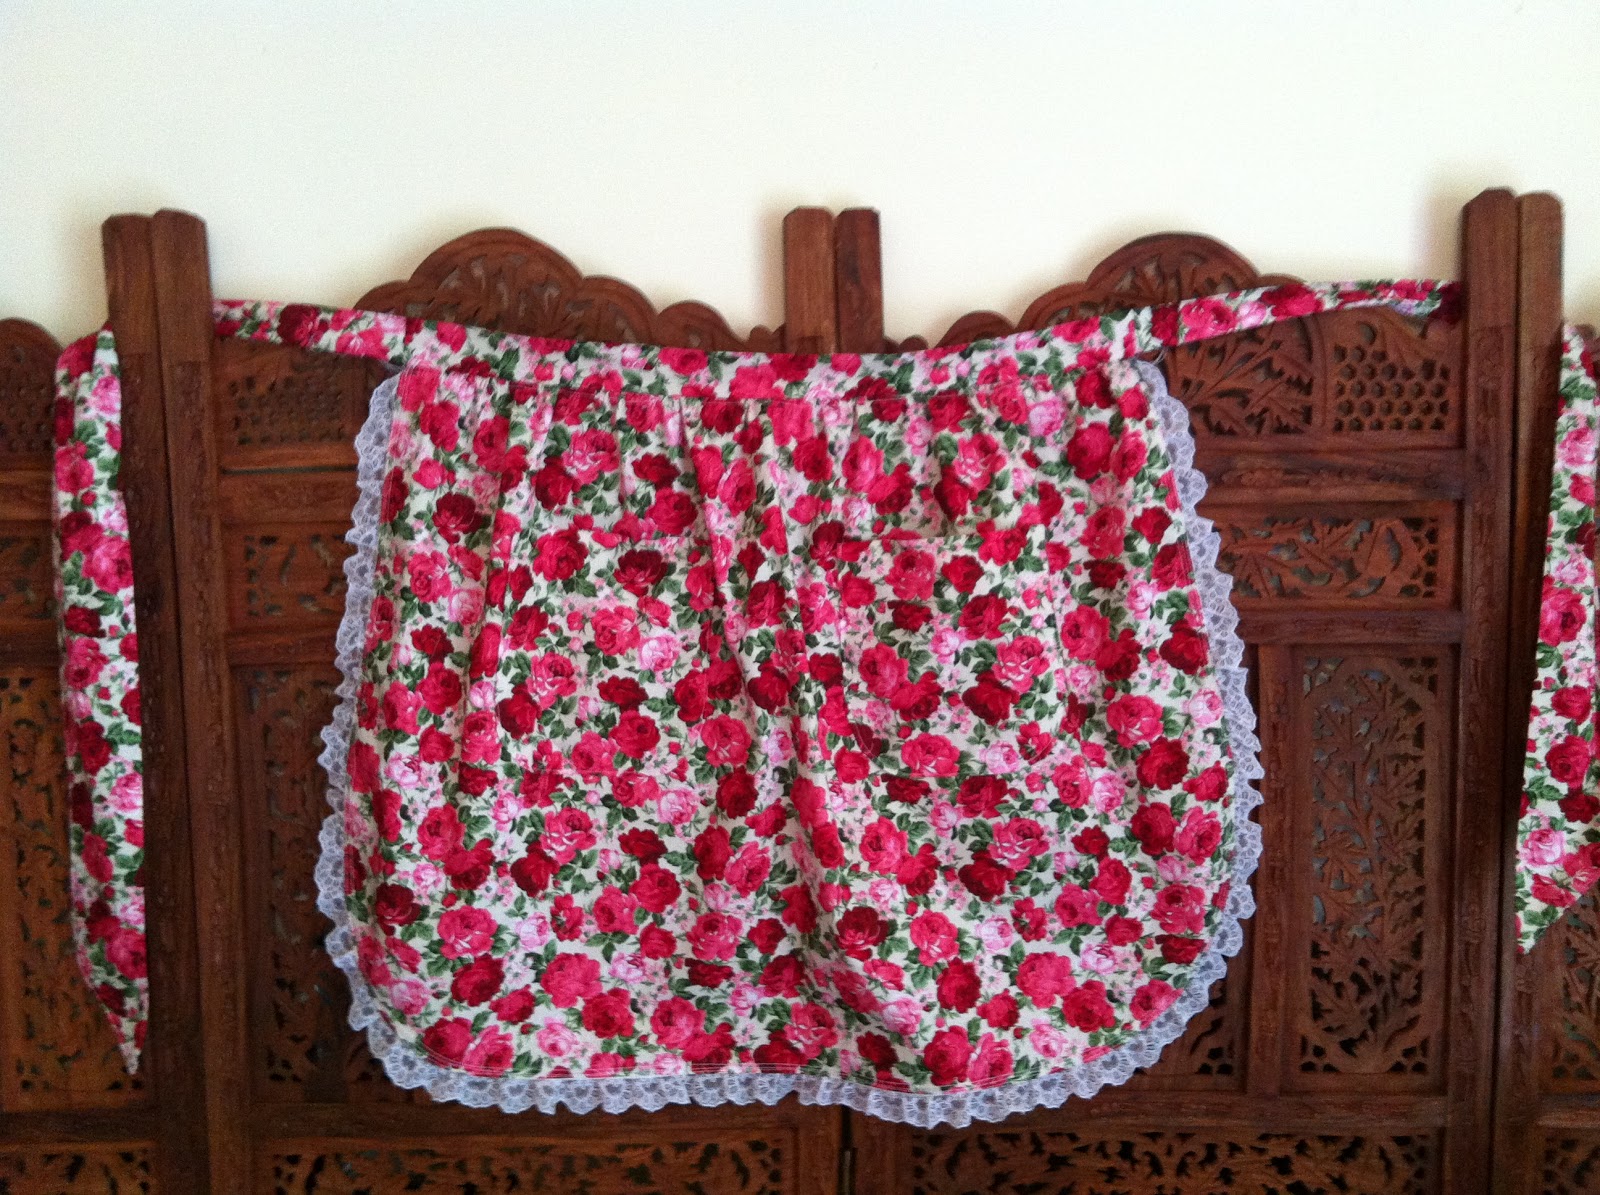
Much as I love the apron that I made, I think it's too pretty to use every day, and I had originally wanted more of a smock type apron so when I found this Kwik Sew pattern I decided it would be perfect. I plan to use the strawberry print fabric I bought a while ago (before I found the rose print fabric and got sidetracked).

$6.95 - bargain!
I'm not sure why I bought the "Flat Fats Bundle" aside from the price, at $6 off it came down to $6.95 which made it hard to pass up. The top fabric is the same as the one I used for the beaks on my Hedwig the Owl blocks, and it makes me think of my friend Phillipa's daughter Miss J who LOVES orange.


And last but not least I found this cute Belle cross stitch pack for $3 so I thought I might do it up for Blossom to hang in her new bedroom.

I'll post about today's shopping trip later - right now I have to run off to buy wine and go to a seafood BBQ at my Aunt's house! Yummo!


Tuesday, 4 October 2011

It's finished!

I finally got over my annoyance and unpicked the stitching on the waistband. It wasn't so bad as I'd originally thought and I only had to re-stitch half. The pattern said to slipstitch the back side of the waistband, but I ended up top stitching the right side of the waistband so that it sat nicely instead.
The topstitched waistband
The completed bodice
The final thing to do was to sew the button holes & buttons. I realised at this point that despite having checked more than once, I'd sewn the bodice onto the skirt backwards. You can only tell if you look at the lace closely.. isn't it annoying when you do something silly like that?? 


 Meanwhile it's been quite some time since I've sewn a buttonhole, so I grabbed my sewing machine manual and referred to the instructions.. there's a time for flying by the seat of your pants, and a time for making sure you don't stuff things up! I used some of my selvage offcuts to practice some buttonholes first, which was a good idea seeing as I needed to adjust my stitch length & width to suit. I'm so glad I didn't take a lazy shortcut, especially as the first "real" buttonhole still looked a bit funny (because of the added bulk of the lace that hindered the fabric feeding properly) although the buttons went on like a dream. Thank goodness!
All buttoned up!
 One of the added bonuses to this pattern appears to be that if you're in the mood you can just let the bodice hang down (you can see the ends peeking out, but when it's done up it doesn't) and just wear it as a half-apron. Which would be handy if I were someone else... my main problem is usually that something splashes onto my top, which is why I need the bodice in the first place!
And so here she is! All finished and complete! And as Bean pointed out, I only have two more to make now (one for him.. in a different design of course! and one for Blossom). I finished the apron just in time to pack it to take on holidays.. Blossom, Bean, my mom and I are heading off on a road trip in the morning to visit my grandparents for a few days. There could be no better opportunity to test out/break in my new apron than with some holiday cooking/baking!

Tuesday, 27 September 2011

Tumbling along

Saturday night we went over to my mother-in-law's for dinner, so of course I took the opportunity to escape into my sewing room and work on my apron.. I was perhaps a little optimistic in thinking that I'd actually get it finished, and ultimately the sewing gremlins came along and made sure that didn't happen!
Bodice sewn, curves clipped
 First I basted the lace onto one piece of the bodice before sewing the bodice together... I turned it in the right way to find that one piece of lace had gotten caught so I had to unpick that section, move the lace as far out of the way as possible and re-sew it. Problem solved.
Bodice in the right way, pressed, topstitched and basted
I pressed the bodice, stitched around the edges to keep it all nice and flat, basted the bottom edge and then pinned it to my skirt.. I was so careful not to catch the wrong bits of the waistband and had it all looking perfect.. until I turned it over..
Bodice attached to the skirt
*sigh*
 The waistband got caught in my stitching. And my un-picker was at my house, not in my sewing room. So I got annoyed and decided that was the end of the apron for the evening. But wait! I had new toys to play with.. so let's crank up Flo the GO and try out my brand spanking new tumbler die! *huge sigh of relief* My fabric squares fit perfectly.
Playing around with my theoretical layout (clearly not to scale)
I pulled out my backing fabric and my Hedwig owls so that I could get a (very) rough idea of the layout that was in my head. I ended up deciding that the tumblers will need to be sashed, probably with the backing fabric because when they were butted up against each other they merged into an undefined blob.. and that wasn't really the look I was going for.
Looks much better with the blocks apart, yes?

Then yesterday I went over after school and spent some time cutting and placing more tumbler blocks to get an idea of how I might actually lay them out. I have a significantly larger amount of harlequin style blocks than any other, and I'm not quite sure what I'm going to do about that as far as layout goes... does it matter if I have them adjoining, or should I try and keep them apart?

Also, if anyone has any tips on how I go about sashing the tumbler blocks I'm all ears, otherwise I'll just follow my instincts and we'll see what happens!

Thursday, 22 September 2011

Tied up

So the weekend was a bit of a bust.. I *did* get a chance to do some sewing on Sunday... for all of an hour! And then it was time to head off to the next activity for the day *sigh*

I managed to sew on the lace trim onto the apron skirt and I also made, pressed, pleated and pressed the apron ties.

Then it took me all week to be able to get another chance to get sewing! This morning I FINALLY had enough time to head over and play for a while before I had to take Blossom to kindy. I top stitched the ties along the seam lines so that they don't twist when the apron gets washed, then I gathered the skirt, attached the ties to the waistband and then basted the waistband to the skirt. Now (if you don't look too closely) you could almost pretend that the apron was finished (if it were only a half-apron).
Then I pinned the lace trim onto the bodice and hemmed the top ends of the lace before Blossom started whinging about being hungry and once again, it was time to pack up and go... but on the upside, the bodice is the only thing left to complete.
Meanwhile, my backordered Accuquilt GO! dies (Baby 2.5" strip & 3.5" tumbler) came on Tuesday! Yay! Not that I've had a chance to  play with my new toys - I figure that I just need to get the apron finished first and then I can throw myself into Harry Potter quilt mode.

Sunday, 18 September 2011

My kingdom for an apron!

One thing I've been wanting for a long time is a nice apron. Not just a generic style apron, but something pretty, classic and evocative. I want it to inspire me to bake. I want to feel like Martha Stewart or Nigella Lawson when I put it on.
Isn't it pretty?
I mentioned in a previous post that my girlfriends and I had been on a shopping trip to Spotlight the other week, and that I finally found a pattern that I liked (and on sale too, more importantly!) and some fabric that I LOVED. But in amongst all my other bits and pieces I just hadn't had a chance to get it started.
I also love that the pattern is multi size & multi design.. and do you love my fabric as much as I do?
Well! On Tuesday night, after I finished cutting shapes for my Hedwig owls I pulled my pattern out and cut out all the pattern pieces that I needed. On Wednesday night after finishing my owls I got my fabric out to press.
Pattern pieces pinned.. dammit, the fabric is folded the wrong way.
On Friday morning I went and laid out my fabric, laid out my pattern pieces, adjusted my fabric to minimise waste and finally pinned all my pattern pieces to the fabric. Then I realized that I'd folded it right sides out instead of right sides together! Argh! Oh well, it won't matter- all of the pieces are symmetrical. So I experimented with cutting my pieces out with my rotary cutter instead of scissors and how much quicker and easier is that?!
That was quick! I love my rotary cutter.
Then I had to set aside my sewing so that I could go to a soy wax candle making workshop with some girlfriends (as blogged on Needles in the Haystack).

After my fragrant excursion Bean, Blossom and I headed back over to my mother-in-law's to show her the candles, have a cup of tea and have her amuse the kids while I holed myself up in my sewing room. I prepared the pockets and attached them to the skirt, then I pressed and hemmed the skirt.
"Easing" the corners while pressing

One pocket all done!
Two pockets all done!

Pockets sewn on. Can you see them? Neither can I.

Pressing the hem on the skirt
After I'd pinned the lace to the skirt I realized that it was quite late and I really needed to take the kids home for bed and cook dinner for my ever patient husband!
Lace all pinned and ready to sew

I'd hoped to finish it off today, but with dancing concert rehearsals, tee ball "meet the coach" day and a "reward" visit to our local indoor play center, the day has just disappeared on me! But there's always tomorrow, right?
Related Posts Plugin for WordPress, Blogger...

ShareThis

Online Quilting Class