Showing posts with label pumpkin. Show all posts

Friday, 26 October 2012

Jacky-Oh! Something Wicked This Way Comes..


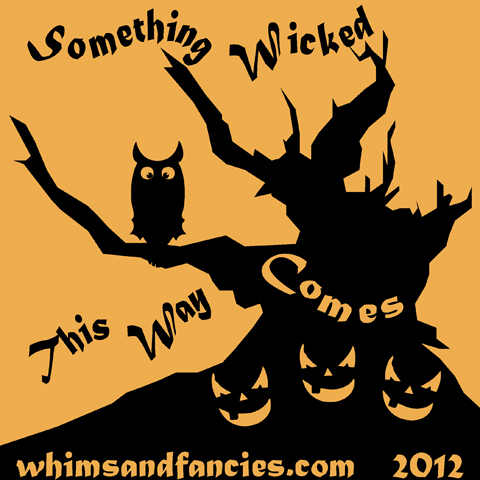
I'm pleased to introduce you to my friend Jacky-Oh! He's a jack-o-lantern that has come to visit for the Something Wicked This Way Comes blog hop!


I was participating in Kristy from Quiet Play's Practically Paper Piecing blog hop when I heard that Soma from Whims & Fancies was organising a Halloween themed paper piecing blog hop. The catch? You had to design an original block. No worries... I'd just received a copy of EQ7 for my birthday from my husband, how hard could designing my own block be??

I knew straight away that I wanted to do a Jack-o-lantern block.. after all, carving pumpkins is one of our favourite Halloween traditions.


I found a free stock photo of a Jack-o-lantern, imported it into EQ7 and threw myself right in the deep end! It took a few tries, but eventually I came up with a block design worth testing:

He turned out ok, but highlighted the fact that very small lines in EQ turn out to be large lines in real life (the part where the left eye isn't actually a triangle - it's not my bad sewing, it was a design flaw!) So I went back and tweaked the pattern a few more times, adjusting his eyes and his teeth..


Alternate tooth position
 I printed out my new pattern, tested it out and voila! A delectably scary Jack-o-lantern!
 I decided that my two blocks would make fantastic snack mats for Bean and Blossom, so I backed it with some super cute jack-o-lanterny goodness (Dem Bones, Carol Eldridge for Andover Fabrics) and ditch quilted it with some Aurifil 28wt thread. I regularly use Aurifil 50wt (this was pieced with white #2024) but I'd never tried out the 28wt.. As luck would have it, I had a spool of orange #2150 from a sample pack that I won some time ago.. and it was the perfect Halloween orange! The 28wt was an absolute delight to sew with, and while it's not super obvious in the quilting (because it's quilted in the ditch), it looks amazing on the binding. I chose a decorative stitch that reminded me of candy corn, to match the candy corn fabric that I used as binding. Seriously, this snack mat is good enough to eat!

 Jacky also looks super scary when he's backlit by the setting sun. No evil spirits will be visiting here!
To be safe around the children though, we might just illuminate him with our faux candle lantern that Grandma brought home for them.

If you like Jacky-Oh! and would like to make a pumpkiny friend of your own, you can find the pattern for free at Craftsy :) There is also an "Extended Edition" available for purchase that has additional templates to create a range of different pumpkin personalities!

Saturday, 22 September 2012

Getting things done..

I pieced my July & August Craftsy BOM blocks simultaneously so that I could save time and feel like I was being really productive. I really like the effect of the traditional dresden plate (especially with the pointed ends on the inside too) but they were very fiddly due to their size. If I was making another one I'd probably have fewer wedges that were a little fatter.
July Block #1 - Traditional Dresden Plate

July Block #2 - Modern Dresden Wheel
I used the "mock needle turn applique" technique that we used for the May QCA bee blocks with the dresden wheel instead of using homespun to back the wheel in order to give the nicely turned edge. The added bonus being that I was able to use the interfacing to fuse the dresden wheel & centre circle onto the background fabric/wheel and then simply top stitch around the edges. Perfect!

August Block #1 - Ohio Star

August Block #2 - Double Star
The August blocks went together quickly and easily. I actually ended up completing them before I finished the July blocks. I love the double star block - this one turned out gorgeously light and pretty, contrasting with the equally gorgeous but darker and more mysterious block that I made for Anorina's July bee block. Definitely a block I'd use again. The Ohio star was very quick and easy to piece, and I  loved the symmetrical effect I was able to achieve with the striped fabric in the hourglass blocks.

August QCA Bee Block for McKenna
Thank goodness the Feathered Star block is finished! It is such a beautiful looking block, but gave me such a hard time! Both Phillipa and I spent a lot of time cursing during construction, and even though I "completed" the block weeks ago, it looked terrible. I had to deconstruct it, adjust it and reconstruct it... and initially I just couldn't bring myself to do all that unpicking. This week I put my action pants on though and I'm pleased to say that it is now in McKenna's hot little hands. 

My test block for the Something Wicked This Way Comes blog hop :)
I finally managed to get a design banged out in EQ7 that I thought was able to be pieced, so I printed out my foundation templates and set to testing. Overall it went together exactly the way I'd hoped, and I just have a few lines to tweak before I make the second test block (hopefully the final block!). My husband thinks I should make some with different facial expressions... which I'll just knock up in all the spare time I have..... no worries, honey! Having said that, I have a couple of ideas on how I could tweak the block a little to give me atleast one more facial expression without a major redesign.


Saturday, 29 October 2011

Preparing for "Happy Pumpkin Day!"

My local shopping centre is running some Halloween themed kids' activities in the lead up to Halloween. Blossom, Bean and I headed down to the shopping centre to make some spider lollipops and look for Halloween pumpkins. 

Spider lollipops, check. I even made the kids wait until we got home before they devoured them so that they could show them to Daddy, and I'd planned to take a photo but they just couldn't wait that long! I turned around with my camera and they were already gone!

Halloween pumpkins @ supermarket #1 (Woolworths), fail. Apparently they'd only received 20 and another lady had come in and bought 15 of them. Supermarket #2 (Coles), fail. Oh dear.. not looking promising on the jack--o-lantern front. Perhaps some paper mache? No? Ok, let's try the Coles another 5 min down the road... Supermarket #3, WIN! Interestingly enough, both Woolies & Coles had pumpkins advertised for ~$4/kg.. but the Coles that we found the pumpkins at had them on sale for 69c/kg!! FTW!! At that price I figured I could afford to let the kids pick a pumpkin each as well as a couple for "Mummy & Daddy"... 4 pumpkins totalling ~11kg later I'd spent a grand total of $7.75! Had I found them at Supermarkets 1 or 2 I'd have been looking at $44 (or more precisely, only one pumpkin for the same price, because we definitely wouldn't have bought four!)

My husband's best friend (and the kids' favourite pseudo-uncle) came over to help out with some other stuff related to the house moving, and stayed for the "Carving of the pumpkins"...
Blossom "scooping out seeds"

Bean's jack-o-lantern design - the first cut.

First eye complete!

Uncle Bryden working on the mouth

Blossom's jack-o-lantern design, first eye complete!

Uncle Bryden working on the other mouth!

Finishing up the nose

Blossom's jack-o-lantern (no, it doesn't have ears, it was just a cool co-incidence!)

Uncle Bryden's new best friend (I don't know why he has pumpkin in his mouth)

Bean's jack-o-lantern 
Time to dim the lights and test them out!
Two more pumpkins to carve tomorrow, "Monster Donuts" to make at the shopping centre and some sewing & cutting I hope!
Related Posts Plugin for WordPress, Blogger...

ShareThis

Online Quilting Class